
Welcome DJ Techvibe the site what provides you with the ultimate guide on revitalizing your listening experience with vintage Cerwin Vega speakers. These timeless classics, known for their robust construction and dynamic soundscapes, are more than just speakers; they’re a bridge to an era where music was as much about art as it was about technology.
In this guide, we’ll dive into the essential steps to unleash the full potential of your vintage Cerwin Vega speakers. From precise placement techniques to fine-tuning the acoustics of your room, get ready to transform your living space into a concert hall. Let’s bring the legacy of great sound into the modern age together!
1. The Placement of you Vintage Cerwin Vega Matters
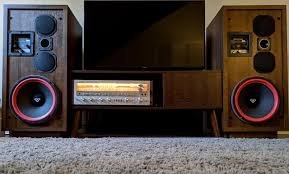
When setting up your vintage Cerwin Vega speakers, precise speaker placement is not just a recommendation—it’s essential for optimal audio quality. Begin by situating your speakers a minimum of a few feet away from any wall surfaces. This distance is crucial as it minimizes early sound reflections and prevents bass frequencies from building up and overpowering the mix, which can blur the details in your music.
For an enhanced stereo imaging experience, it’s advisable to position the speakers so they form an equilateral triangle with your main listening position. Angle the speakers slightly inward, targeting them towards your ears in the listening area. This configuration not only sharpens the stereo effect, creating a more vivid and three-dimensional sound stage, but also ensures a more immersive listening experience, enveloping you in a more precise and lifelike sound.
Lastly, the height at which you place the speakers can also impact the sound. Ideally, the tweeters should be at ear level when seated. This alignment provides the clearest path of sound to your ears, minimizing any interference and allowing the full spectrum of frequencies to be heard as intended. Fine-tuning these aspects of speaker placement will greatly enhance the performance of your vintage Cerwin Vega speakers, turning your listening space into a dynamic and expressive audio environment.
2. Check Room Acoustics
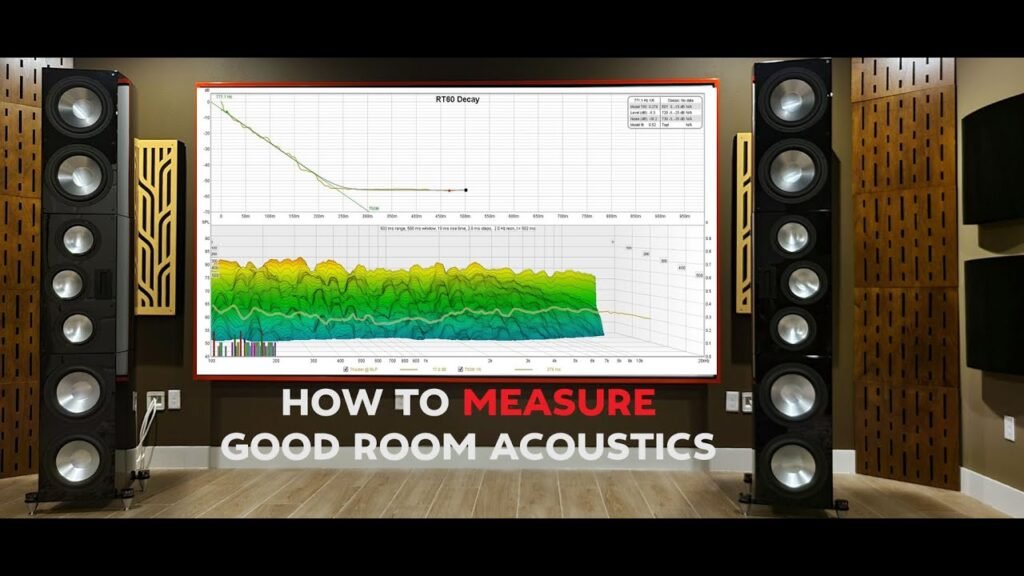
When setting up vintage Cerwin Vega speakers, carefully analyzing and adjusting your room acoustics can drastically enhance your listening experience. Here’s a detailed guide to optimize your space:
- Assess the Environment: Begin by noting the materials and layout of your room. Hard surfaces like concrete or glass can reflect sound, causing distortions and muddling audio clarity.
- Use Absorptive Materials: To mitigate unwanted echoes and reflections:
- Install thick drapes on windows.
- Place plush rugs or carpets on bare floors.
- Use upholstered furniture which can absorb sound.
- Install Acoustic Panels: Position panels strategically around the room, particularly on walls directly opposite the speakers to absorb high-frequency reflections and reduce echo.
- Arrange Furniture Wisely:
- Bookshelves filled with books can act as diffusers, breaking up sound waves.
- Avoid placing large objects directly between you and the speakers which can obstruct sound paths.
- Address Low Frequencies: Bass traps in room corners can help manage low frequencies, preventing them from overpowering the room.
- Experiment with Speaker and Listener Position: Sometimes moving speakers just a few inches can significantly change sound perception. Test different placements to find the optimal sound.
Implementing these strategies will help achieve a balanced, clear, and more dynamic sound from your vintage Cerwin Vega speakers, making every listening session a richer and more enjoyable experience.
3. Amplifier Synergy
When setting up vintage Cerwin Vega speakers, finding the right amplifier is critical to maximize their performance. Here’s how you can ensure the best possible synergy between your speakers and the amplifier:
Evaluate Power Needs:
Vintage Cerwin Vega speakers are renowned for requiring substantial power. Choose an amplifier that can provide enough wattage to drive the speakers without causing distortion, especially at higher volumes. This ensures clean, clear sound across all levels of output.
Select the Appropriate Amplifier Type:
Depending on your sound preference, you might opt for a tube amplifier, which is favored for its warm, rich tonal quality, ideal for vintage audio gear. Alternatively, a solid-state amplifier could be chosen for its precision and durability, offering a more modern approach to audio clarity.
Ensure Impedance Matching:
Matching the impedance of the amplifier to that of your speakers is crucial. This compatibility helps to maintain the electrical efficiency and the best possible audio performance, reducing the risk of damage to both the speakers and the amplifier.
Connectivity Checks:
Before finalizing your setup, make sure that your amplifier has the appropriate connections for your vintage speakers. This includes checking for compatibility with any unique connectors or wiring requirements the vintage speakers might have.
Fine-tuning:
Once all components are correctly connected and set up, take the time to fine-tune the system by adjusting the amplifier settings and listening at different volumes. This will help you calibrate the system to your specific listening environment and preferences.
By carefully selecting and setting up your amplifier, you’ll ensure that your vintage Cerwin Vega speakers deliver their full sonic potential, providing an enriching audio experience.
4. Fine-tuning Your Vintage Cerwin Vega speakers

Fine-tuning the setup of your vintage Cerwin Vega speakers is an essential step to achieve the best sound quality. Here’s a detailed guide to help you refine your audio system:
- Optimize the Listening Position: Start by finding the optimal listening position, often an equidistant point from each speaker forming an equilateral triangle with them. This spot is typically considered the ‘sweet spot’ for the most balanced sound.
- Adjust Speaker Positioning: Minor adjustments in the placement of the speakers can have a significant impact. Experiment with angling them slightly towards or away from the listening position to fine-tune stereo imaging and soundstage depth.
- Tweak Equalization Settings: Utilize an equalizer to adjust the low, mid, and high frequencies to match your room’s acoustics and personal preferences. This can help mitigate room-induced distortions and enhance overall sound clarity.
- Experiment with Components: Try different cables, stands, or other accessories that might influence the sound. Higher quality cables, for example, can sometimes offer a cleaner signal path.
- Conduct Regular Listening Tests: Periodically sit down to critically listen to a variety of music tracks. Note any audio qualities that seem off and make adjustments accordingly. This iterative process is key to achieving the best setup.
Implementing these steps will ensure that your vintage Cerwin Vega speakers are perfectly tuned to your environment, providing you with an exceptional listening experience.
5. Regular Maintenance
Regular maintenance of your vintage Cerwin Vega speakers is essential to ensure they continue to deliver top-notch performance. Start by inspecting the speaker cabinets for any signs of wear, such as loose joints or exterior damage, which could impact sound quality. Next, examine the speaker cones themselves for any tears or deterioration; these are crucial components for sound production, and any damage should be addressed promptly to avoid further issues.
Additionally, it’s important to regularly clean and tighten the connections. Dust and corrosion can accumulate on speaker terminals, potentially degrading the connection and impacting audio quality. Use a quality electronic contact cleaner to maintain clean connections and ensure all wiring is securely fastened. This will prevent any loss of sound quality due to poor connections.
Lastly, consider the environment where the speakers are kept. Extreme temperatures and humidity can adversely affect the materials of your speakers. Maintaining a stable environment with controlled temperature and humidity will help preserve their condition and performance over time. By following these maintenance steps, you can help ensure your vintage Cerwin Vega speakers continue to function beautifully for years to come.
Conclusion
Setting up and maintaining vintage Cerwin Vega speakers involves meticulous attention to detail to achieve the best sound experience. Proper placement and room acoustics are fundamental, ensuring the speakers are positioned optimally within a well-tuned environment. Matching the speakers with the right amplifier and carefully adjusting settings further enhances audio quality.
Regular maintenance, including checking the physical condition and ensuring all connections are clean and tight, will keep the speakers performing at their peak. By following these guidelines, you can enjoy the powerful and dynamic sound quality that vintage Cerwin Vega speakers are renowned for, making each listening session a truly immersive experience.